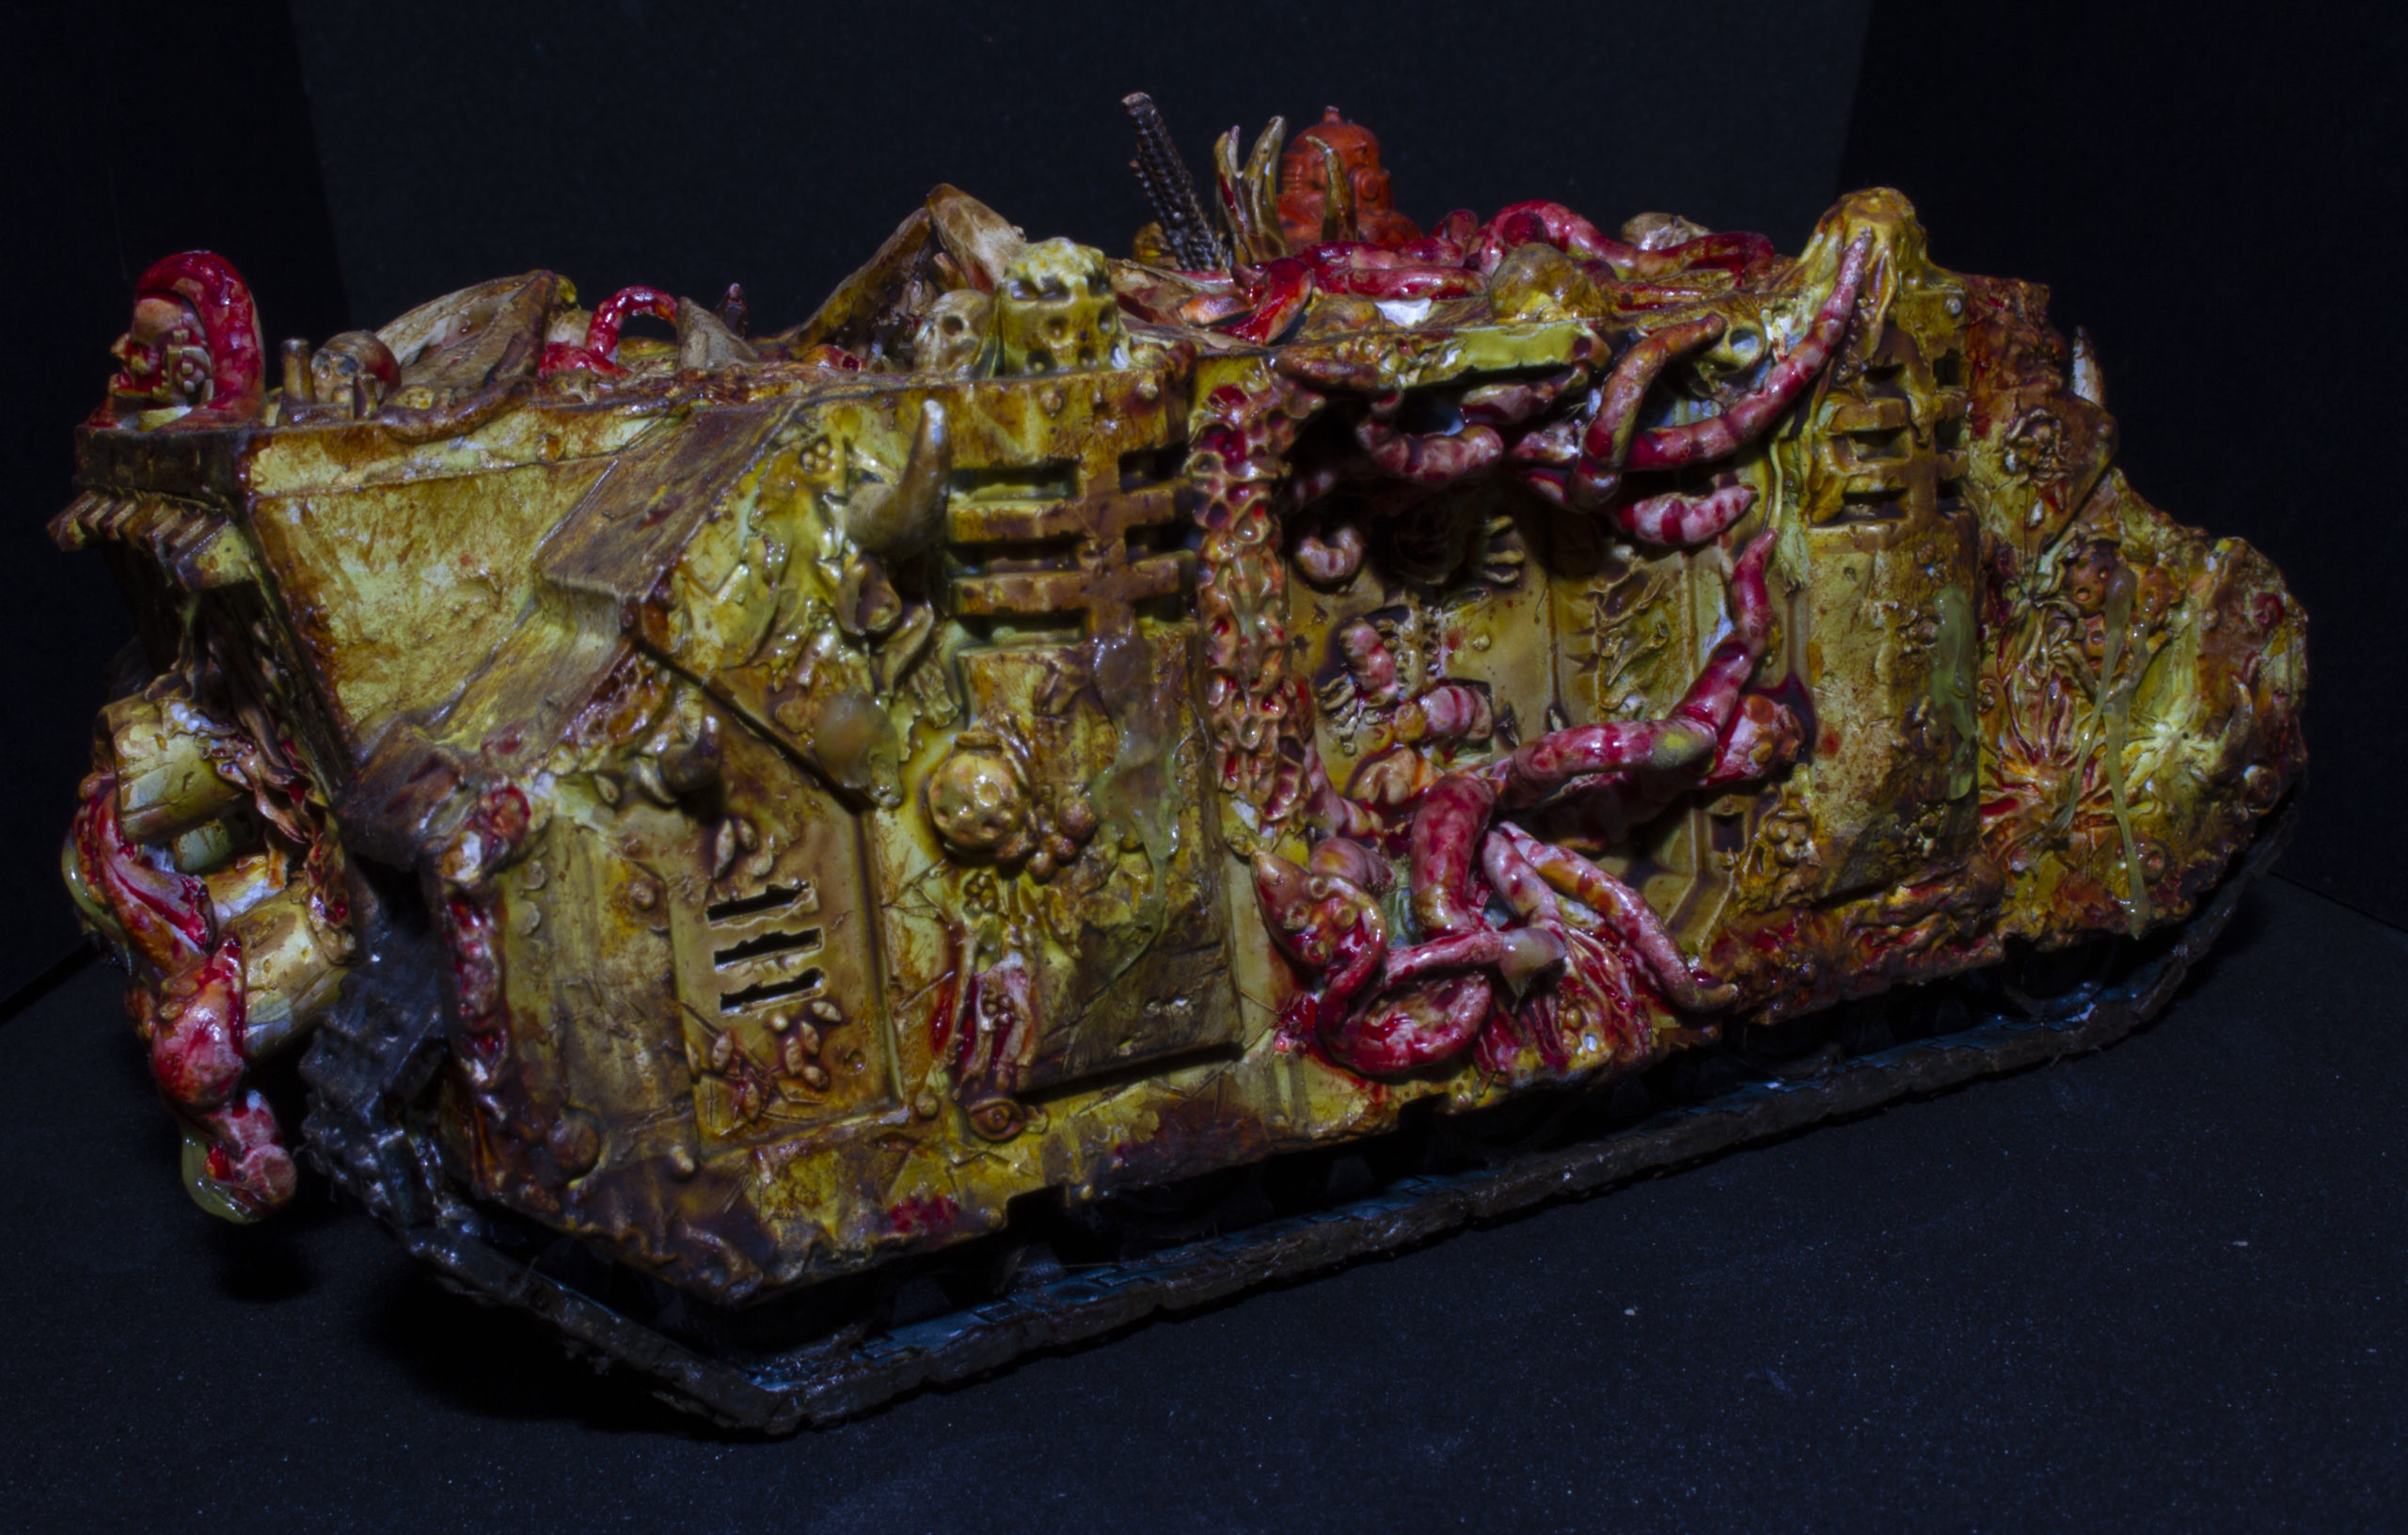
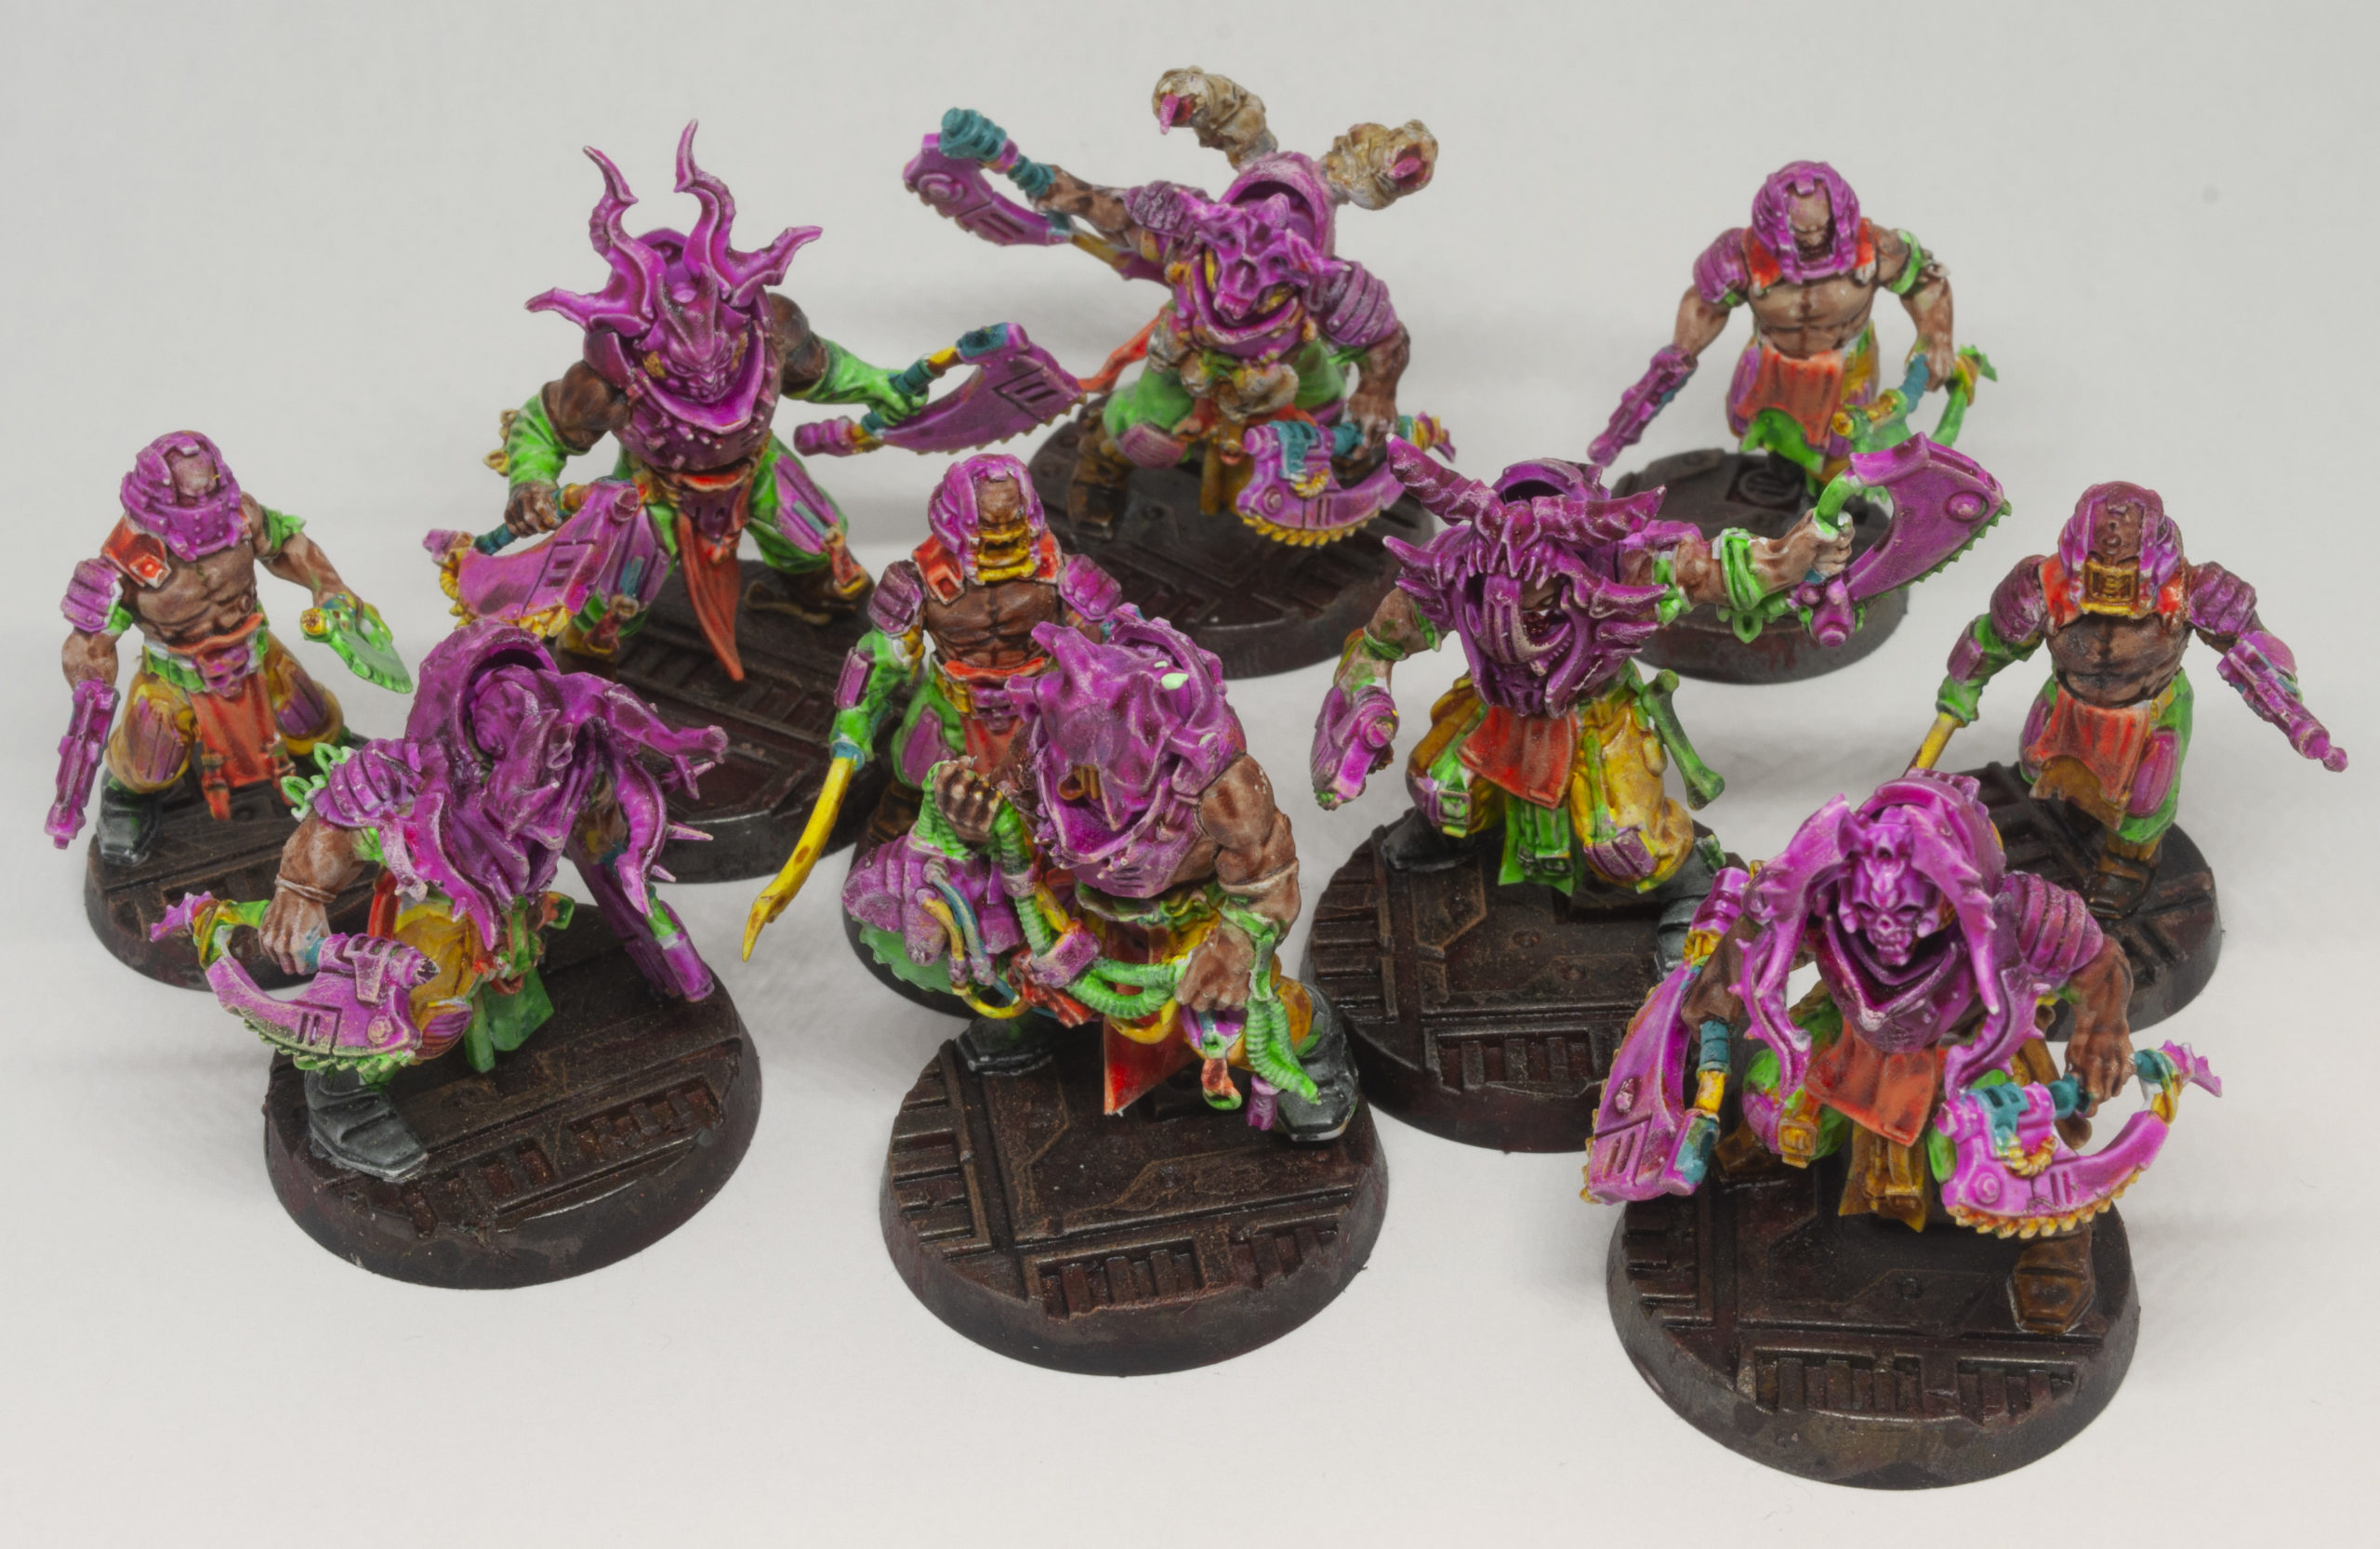
Here’s a guide to photographing miniatures. Here is what I have found, through experimentation, gets the best results. Ideally you want a setup and method that will work on a variety of cameras, and which produce consistent, repeatable results. The models should be well illuminated and in focus, even when large models which can have quite a lot of depth are photographed, but you don’t want any offputting background detail to show.
A light box is recommended
Should it be Big or Small?
Depends what you want to use it for, small is good enough for most minis, but you might want to photo bigger items for ebay. Small folds down to a flat 30cm square, large is like a 2D suitcase. The pop-up ones will do your head in trying to put them away. Small comes with it own lights built in large does not.
The small works well in most cases. For larger models, you might want to place card or paper avoid the corners of the box showing in the photo.
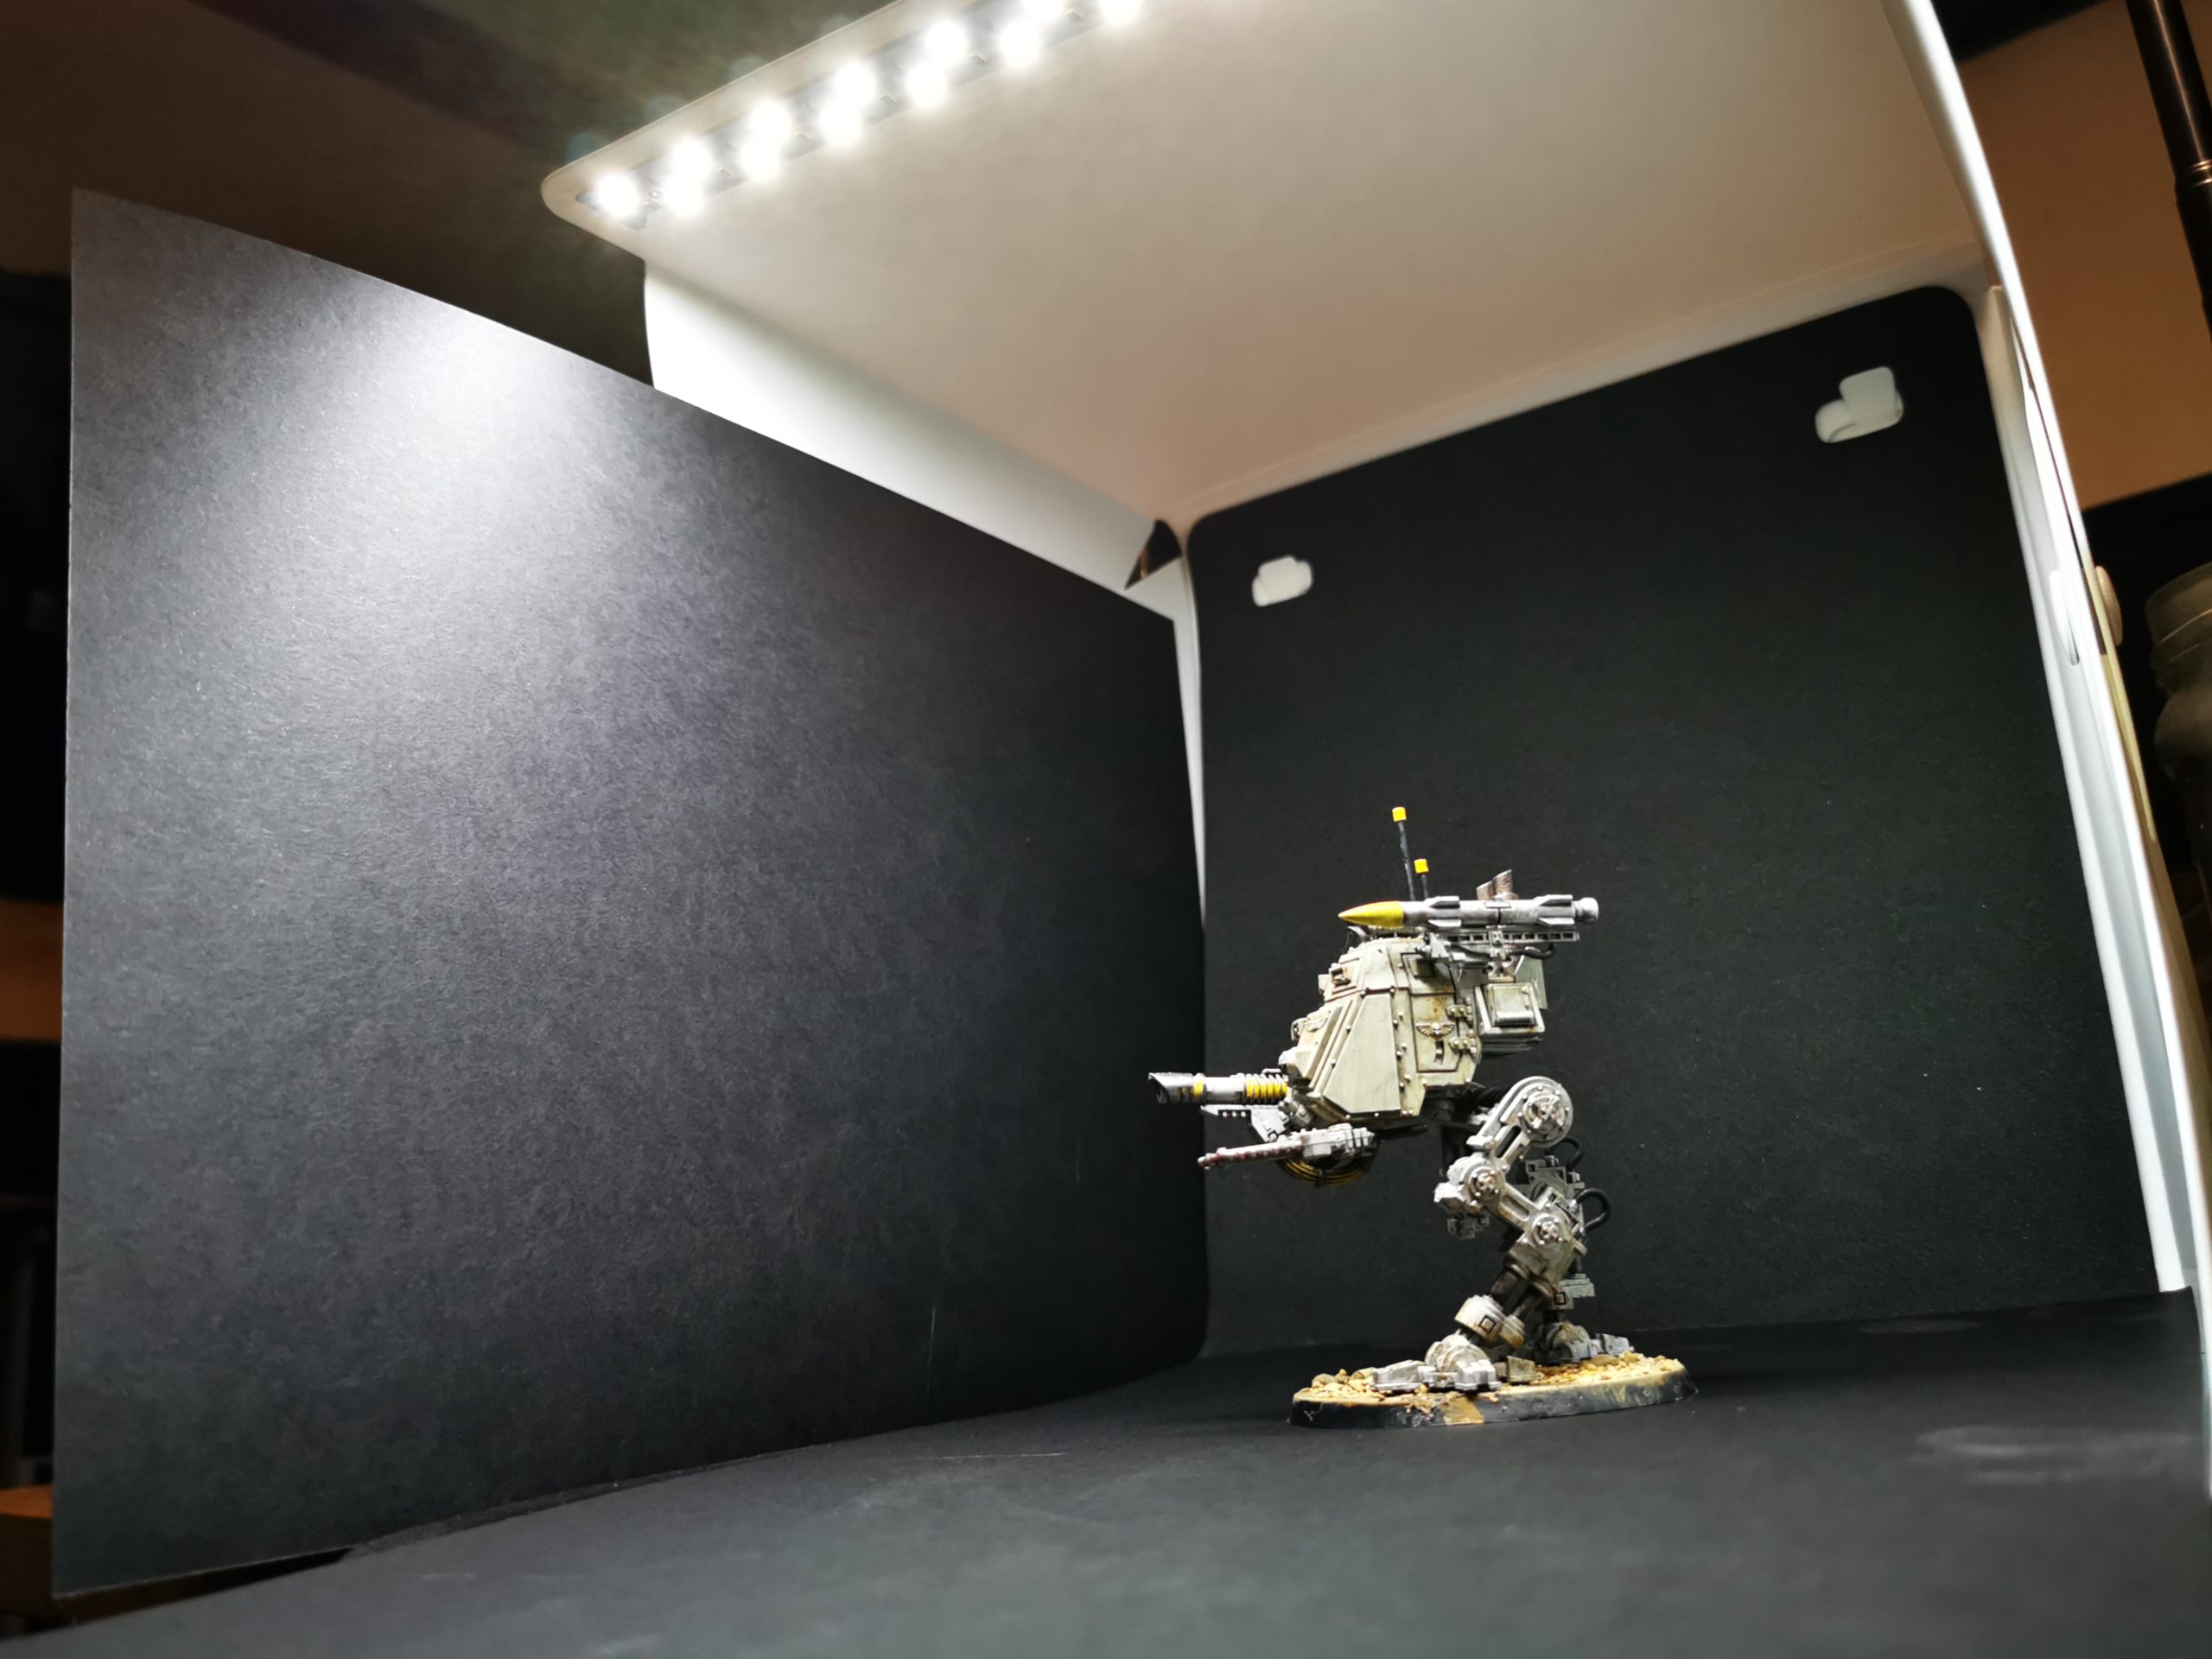
Should it be White or Black inside?
Personal preference. Both are a bit of a pain to keep clean, so I’ve ended up using card and replacing it over time. The supplied insert with the curve works better as it avoids the corner showing behind the model. I started with white but moved to black, white shows shadows and gets dirtier quicker, black is a less distracting background but dark models struggle to stand out against it.
Additional lights are recommended
Ideally you want light in front of the model and from above. Light behind the model confuses the camera or lights up the background (not good) and light from below looks a bit odd – unless you are going for a spooky effect. You want light from at least two sources to avoid a hard shadow both behind the model and on it. The strip of lights that comes in the small boxes pretty much meets all those needs as long as you place the model behind the lights. The big boxes sometimes come with two lamps – those are fine to be pointed in from the from the front on either side, but if they come with incandescent bulbs, do yourself a favour get them swapped with bright, white LEDs, they are a better colour and don’t get burning hot, should be a GU10 fitting or similar. Other lights options are LED work lamps, either flat panel or circular – these both provide soft, white, multidirectional light which is what you need. You complete the final light by using the flash on the camera.

Using a tripod is recommended
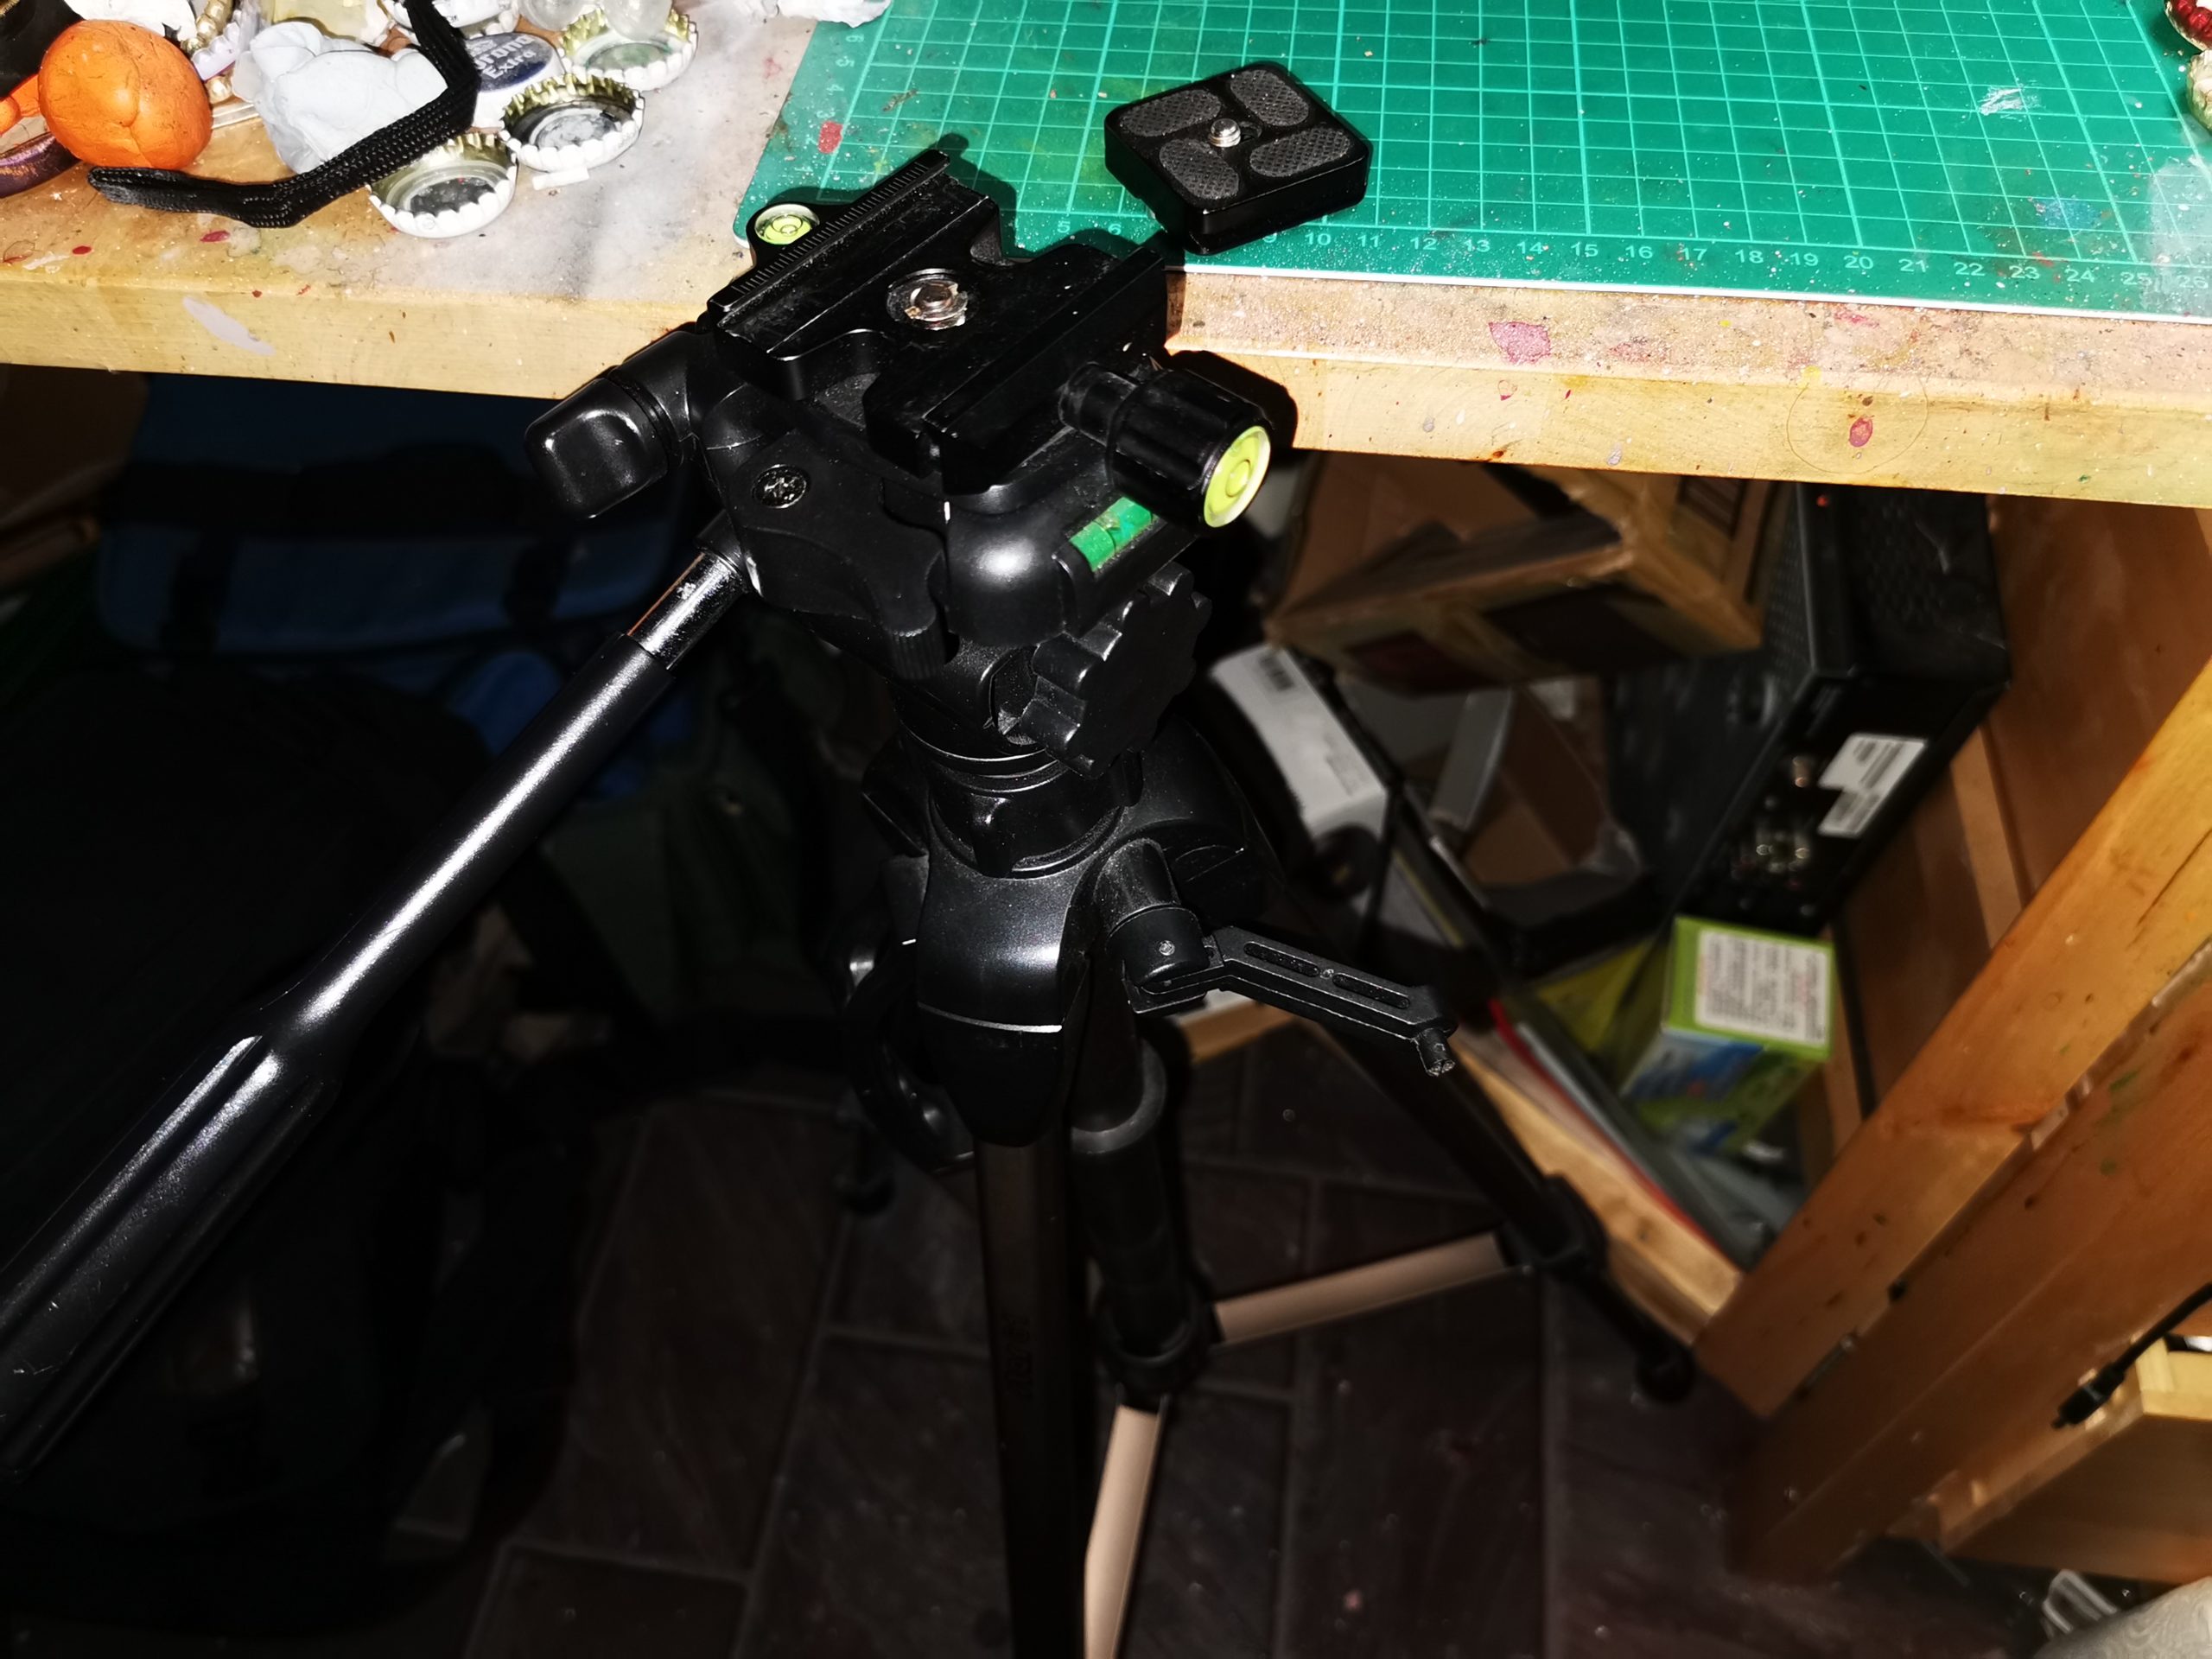
The method I use to take pictures relies on a slow shutter speed, usually between 1/4 and 1/2 of a second. It’s not possible to hold the camera still in your hands for that long (I find anything quicker than 1/125 of a second a challenge), so get the camera on a tripod so it’s good and solid. I use a fairly standard floor-mounted one that can extend up to about my height, fitted with a quick release adapter for a standard plate I have attached to each of my cameras. A small desk-mounted tripod would only work for small cameras or phones.
Can I use a small camera or phone?
While this guide recommends using a full camera to take the shots, as it is required for the settings outlined below, it would be possible to use a small camera or a phone – however for best results good lighting and a tripod are still recommended – you can see an example of a phone mount just behind the large circular LED lamp in the picture above. Both types of device have a lot of clever programming to help you get a good picture and by giving them stability and plenty of light, you are making it easier for them to give good results.
Not keeping the camera steady and not having enough lighting are the two main causes of bad miniature photos – fixing these two issues will instantly make you a better miniature photographer.
The reason for having a tripod is to stop the camera moving while the picture is being taken, so the other part of that equation is to make sure you don’t touch the camera when it is taking a picture. Either use the timer and keep your hands well away, or use the remote control or app to trigger the shots.
What cameras and lenses should I use?
The type of camera doesn’t matter so much as the settings, however you will need a camera/lens with an adjustable aperture. The trick is to use a small aperture which allows you to keep the whole model in focus – quite often you see pics where some parts of the model are blurry, either the close parts or the far away ones – this tries to avoid that. Because the aperture is small, the scene needs to be very well-lit, which is where all the lights come in.
Another trick to get more light in is to use a full-size SLR camera – even though the shots are taken (perhaps counter-intuitively) with a small aperture, an SLR camera has a much larger sensor on which the image is captured so you have more light coming into the camera to begin with.
For lenses you might think that ones with a larger maximum aperture, or a longer focal length would work better, but I have not found that to be the case. Perhaps there are some mid-range macro lenses I don’t have in my camera bag designed for this sort of thing, but I usually find that the cheapest smallest focal-length zoom stock lenses (ie: the one that probably came with the camera) work the best.
Starting from around 6 inches away, unzoomed I move the camera backwards and forwards until I get it as close as I can with the object still within the frame while checking by half-pressing the shutter to make sure the camera can achieve autofocus lock. Then I just zoom in if required so the object fills the frame and make sure that the autofocus still works.
With other cameras or lenses you may need to move further away and zoom in more, but be warned the further you are from the model the more flat the resulting image will appear. A full-frame camera may struggle to focus closer up, but since they have a larger sensor you do not have to worry as much about filling the whole frame, as you can cut the edge off in Photoshop and still have as good a picture as my camera with a smaller APS-sized sensor.
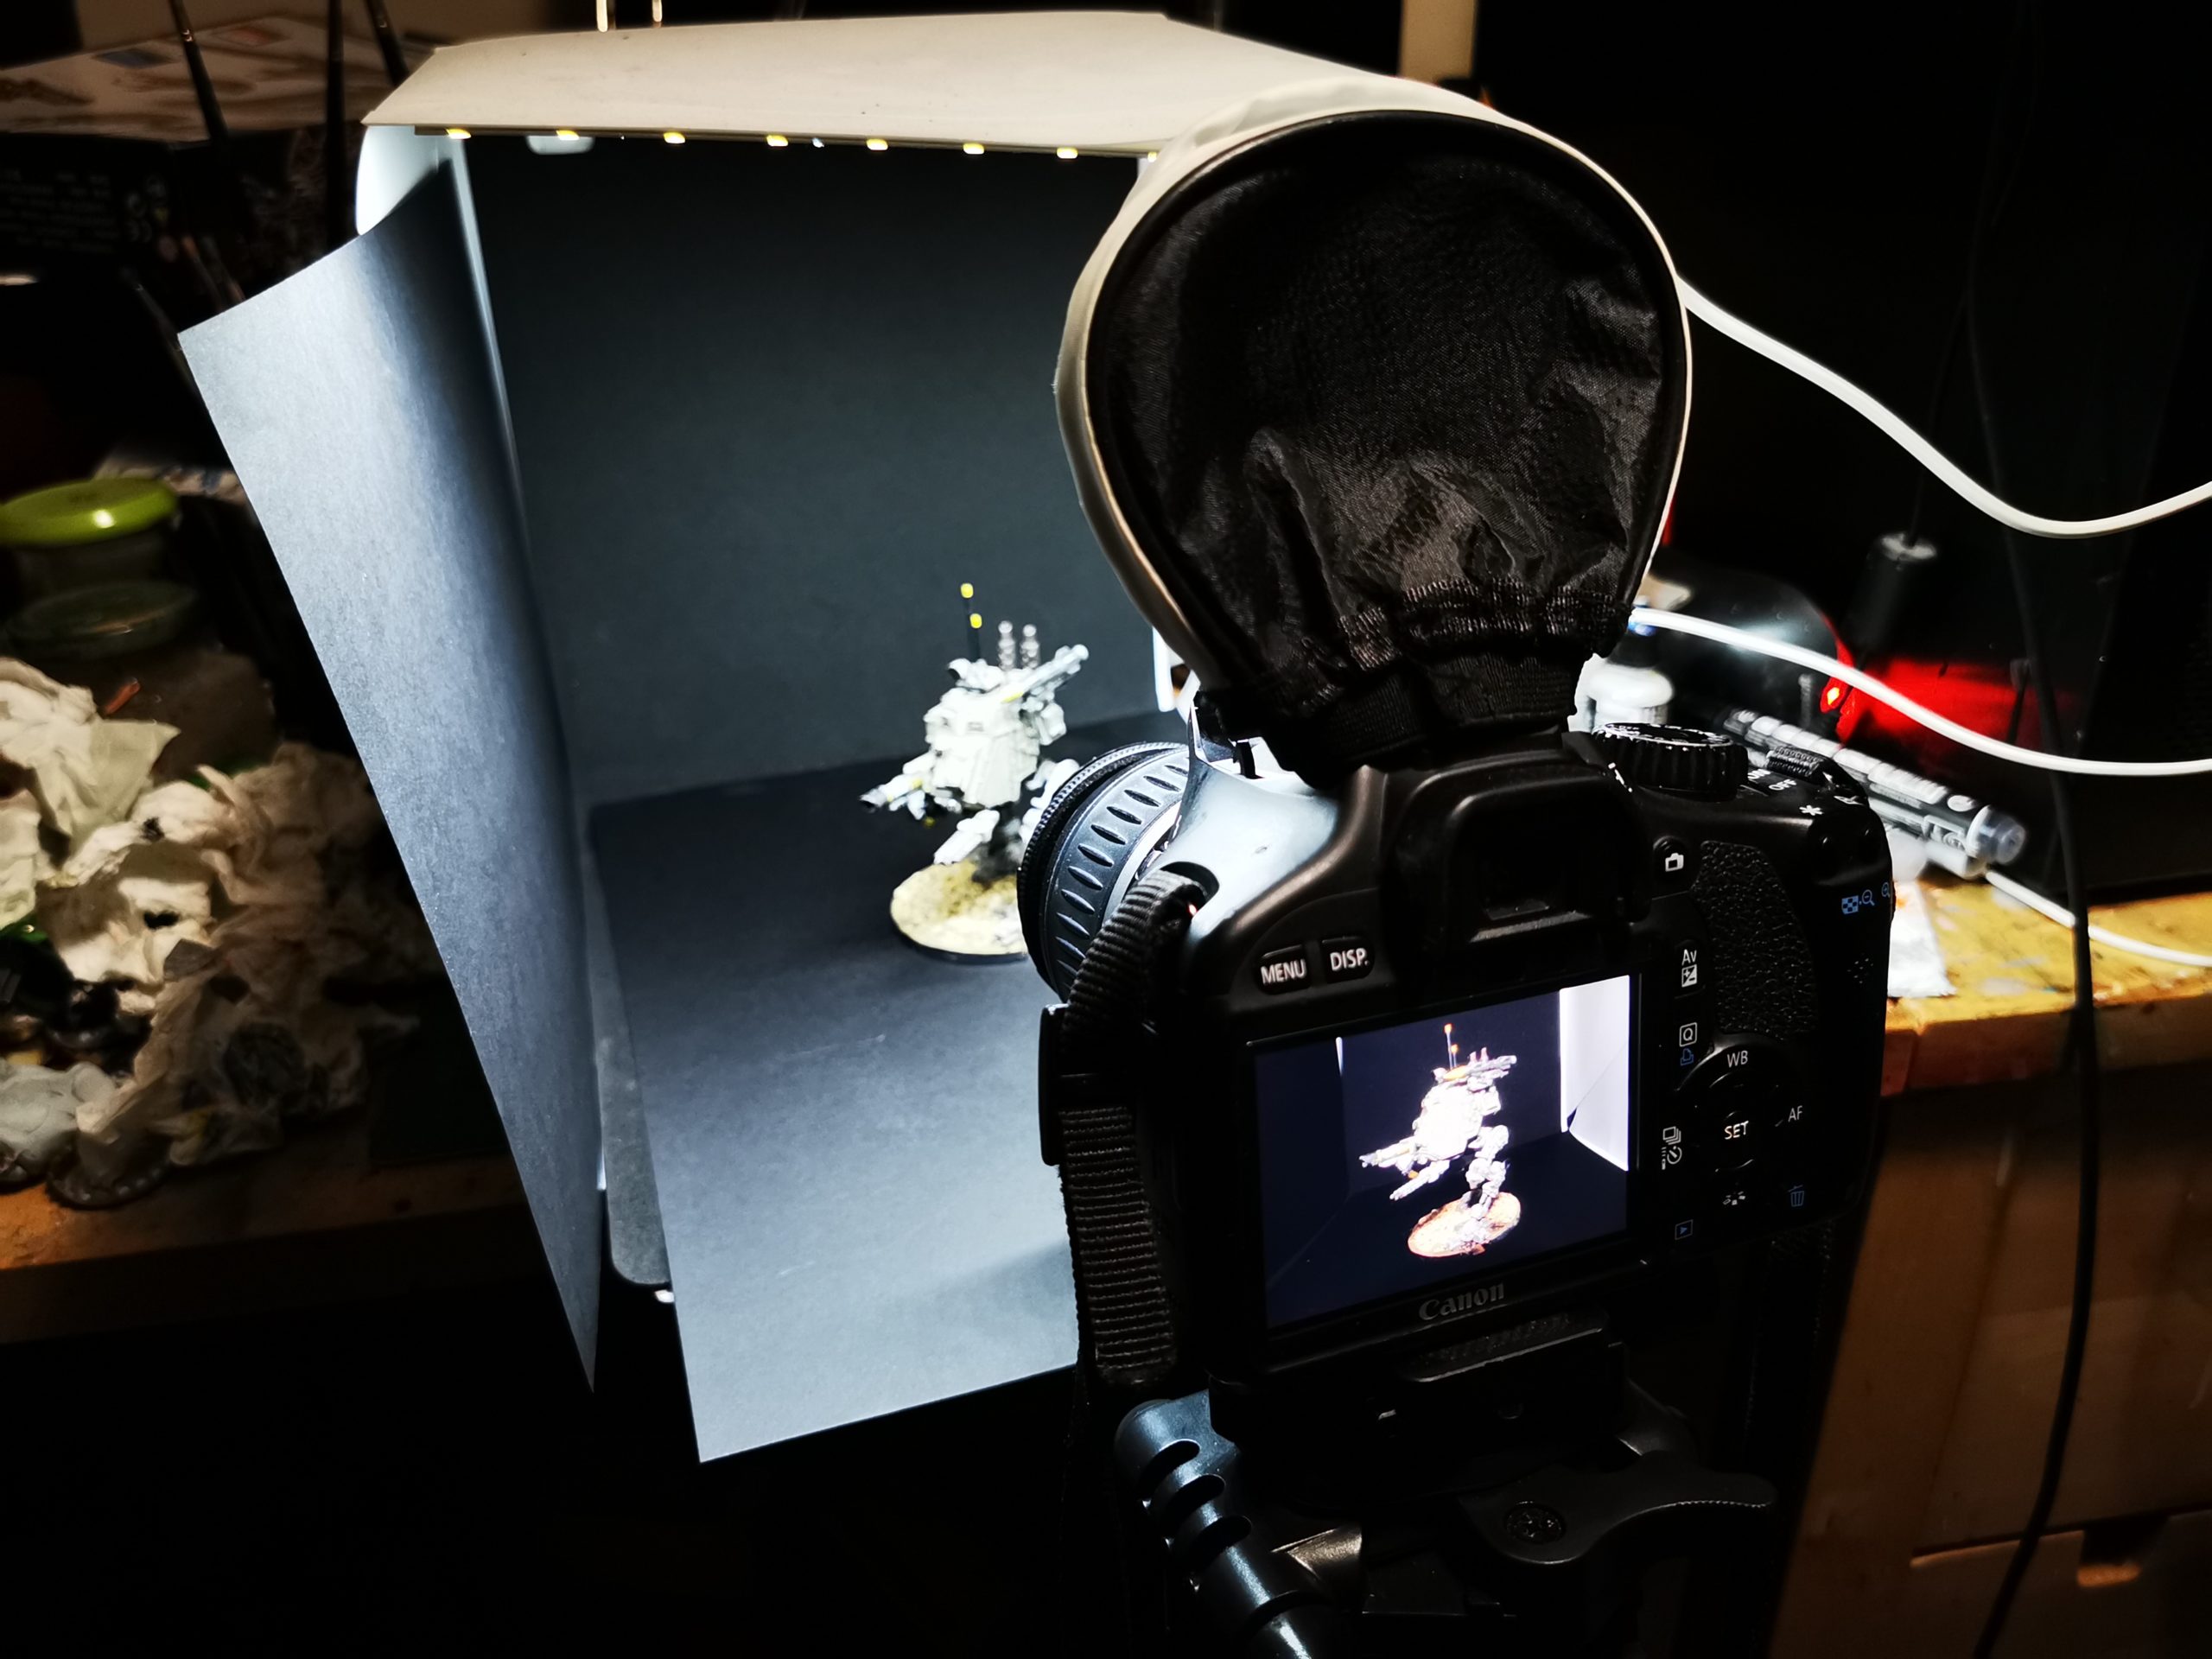
What camera settings should I use?
Here’s an explanation of the settings on my camera I use for pretty much every shot. I wanted something that would work for all miniatures, from tiny to big even where some parts are quite far away compared to others.
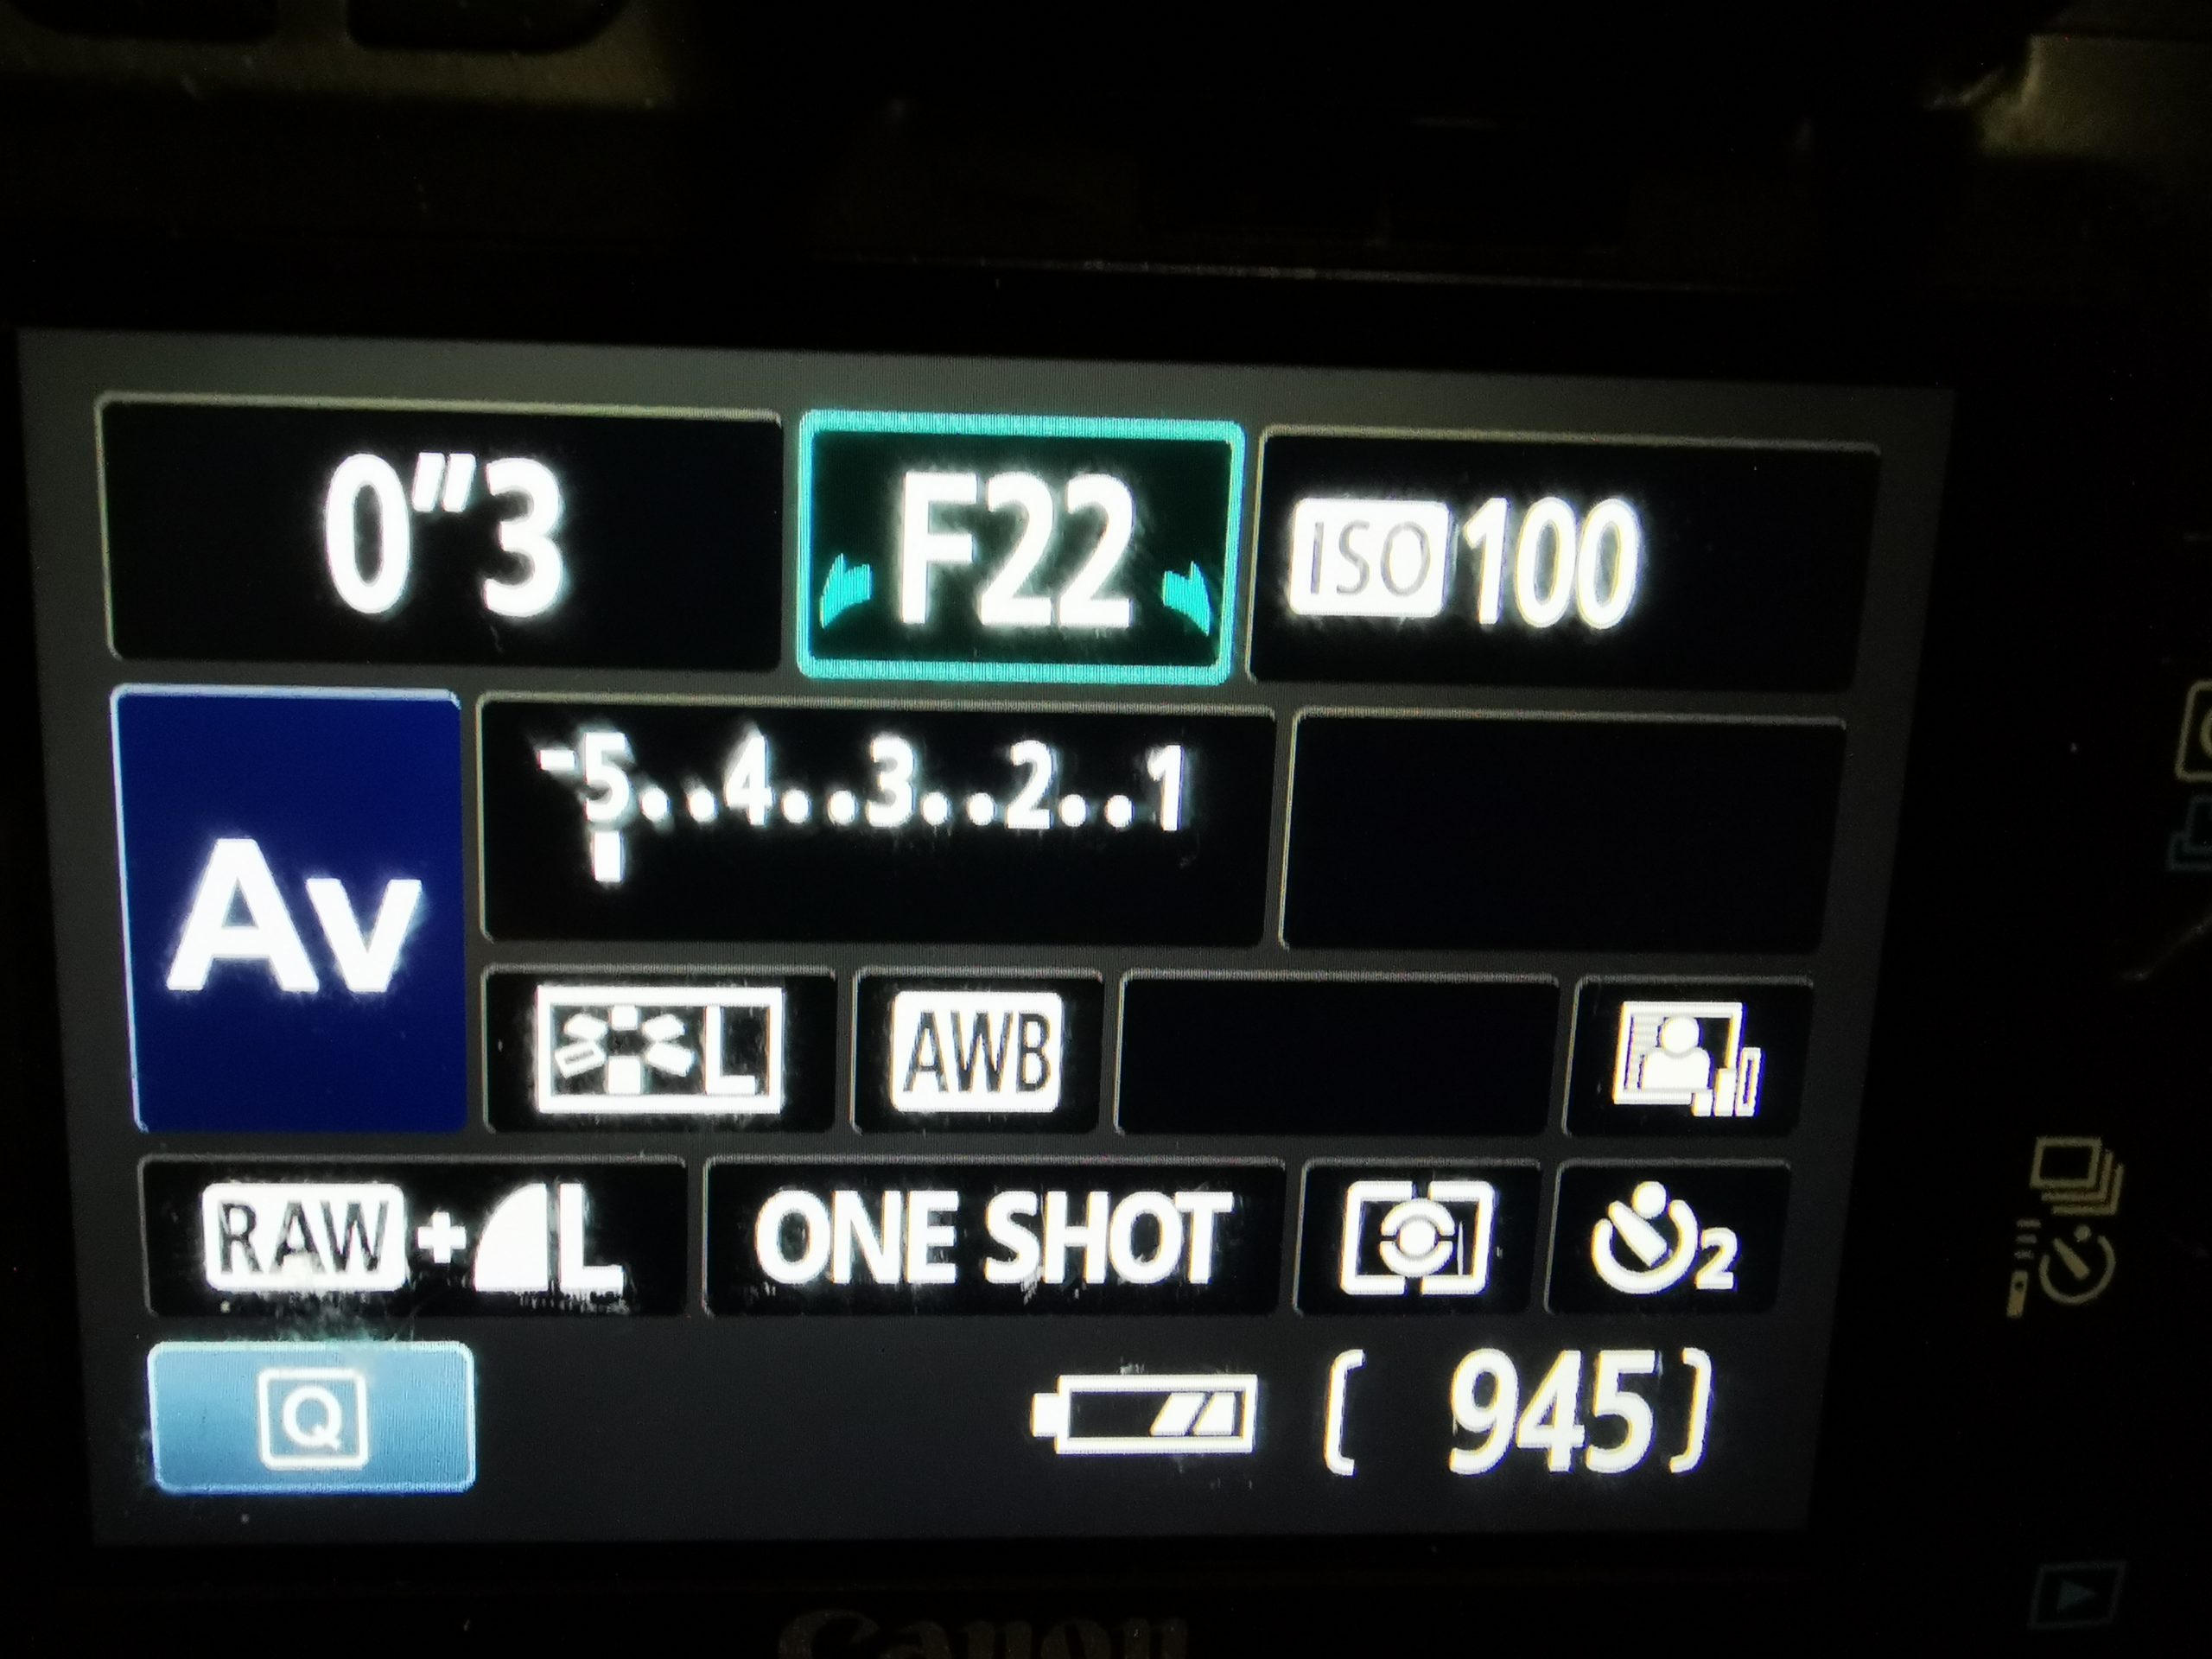
Top middle is the Aperture I have set: f22 which is as small as my camera goes.
ISO 100 is set for nice image quality.
In the middle the gauge where it is set to -5 (minus 5) is the EV value – this is like a brightness control and it’s being used as a little trick here. The flash is going to be fired to flood the scene with light, with the brightness turned right down the already perfectly-well lit model will be picked out while the background will not. This is a trick they use on TV where they appear to be interviewing people in a totally black room, whereas in reality the room is normally-lit and they overlight the people and correct it in the camera. (It won’t work if the mini is too close to the background though)
The only other control worth mentioning is the circle timer with the 2 on – this shows that when I press the shutter, I have two seconds countdown to make sure my hands are off it and it’s still.
The last part is to pop open the built-in flash and put on my flash sock. Yes, my flash sock.
The built-in flash on almost every camera I have ever used is a very blunt instrument that almost never does what you want it to – usually producing an overblown washed-out mess. Luckily this little, inexpensive addon is perfect for softening the hard edge of the flash being blasted at the model from close range and the -5 EV exposure setting does the rest.
You might have to tweak some of the numbers on your own camera to get the same results, but that’s the basics.

Hope it goes well.
